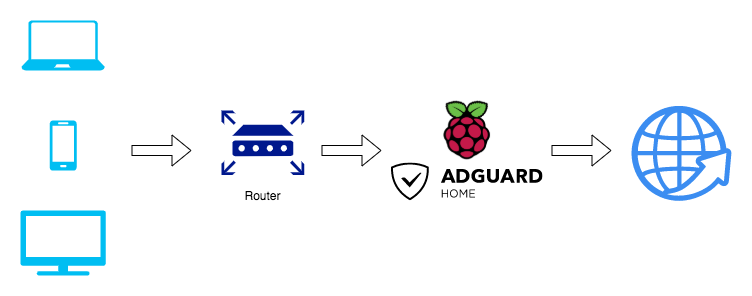
Today, we are going to install AdGuard Home on a Raspberry Pi Zero W.
AdGuard allows you to get rid of intrusive ads, online tracking, and also protect your computer from malware! The AdGuard Home Raspberry Pi setup process couldn’t be easier.
Before we begin, make sure you have the latest Raspbian image installed and that you can SSH into your Raspberry Pi.
What you’ll need:
- Raspberry Pi
- Raspberry Pi power supply
- MicroSD card
- SSH client
Step 1: Installing AdGuard Home
SSH into your Raspberry Pi, run sudo apt-get update , and sudo apt-get upgrade to update all packages.
In addition to those commands, run the commands below to get the latest version of AdGuard Home, extract the archive, and install it.
wget https://static.adguard.com/adguardhome/release/AdGuardHome_linux_arm.tar.gz
sudo tar xvf AdGuardHome_linux_arm.tar.gz
cd AdGuardHome
sudo ./AdGuardHome -s install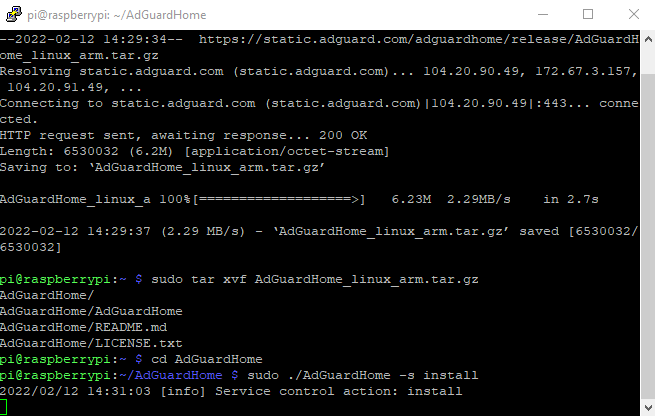
That’s all there is to it! AdGuard is installed and now it is time to do some configuration in the web interface.
Step 2: Access the AdGuard Home Interface
To access AdGuard Home, enter the IP address of your Raspberry Pi and port 3000 in your web browser.
http://[IP_ADDRESS]:3000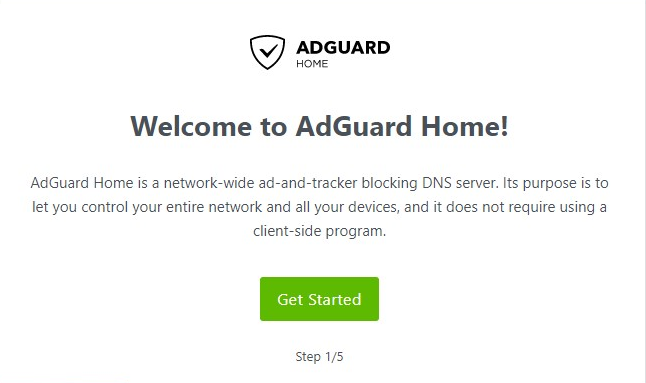
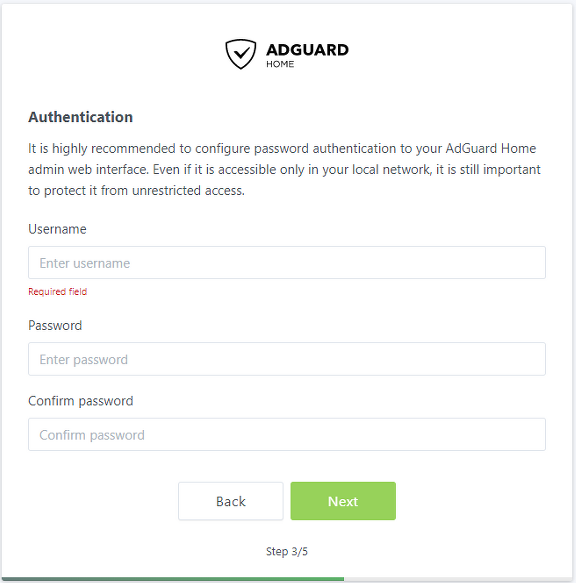
Create your login for the AdGuard Home admin web interface.
Configure your devices individually, or point your router to listen on your Raspberry Pi’s IP address.

AdGuard Home is now completely set up and installed! You no longer use port 3000 when accessing the web portal. Instead, you will only use the IP address of your Raspberry Pi.
Step 3: AdGuard Home Settings
I recommend you check out some of these settings after installation:
- Settings>General Settings: This is where you can configure logging and query retention.
- Filters>DNS Blocklists: Add your own blocklists here. Some of my personal favorite are https://abp.oisd.nl/ , https://block.energized.pro/basic/formats/hosts.txt, and https://www.github.developerdan.com/hosts/lists/ads-and-tracking-extended.txt.
- Filters>DNS Allowlists: Whitelist any domains that should not be blocked.
There are a plethora of other options that I recommend you take the time to familiarize yourself with.
Next Steps:
Installing AdGuard Home on a Raspberry Pi is incredibly easy! Set it up to your liking to easily block ads, online tracking, and prevent malware infections!