In this guide, I will show you how I turned my Raspberry Pi 4B into a palm-sized travel router using OpenWRT!

I am on the road a lot and I want to stay connected, but I also to keep my internet traffic hidden from potentially malicious actors. I figured it was time for me to look into buying a travel router such as the GL.iNet GL-AR750S-EXT. While this is an affordable and more convenient option, I wanted to work with what equipment I already had. This made my Raspberry Pi 4B perfect for a DIY spin on a full-fledged travel router!
What you’ll need:
To get started building your Raspberry Pi travel router, you will need:
- Raspberry Pi (I recommend a Raspberry Pi 3 and above)
- A single USB WiFi adapter (you will need two adapters if you are using an older model with no built-in WiFi)
- A microSD card (32GB or above is recommended)
- SD card reader
- Power supply for Raspberry Pi
- puTTY (or a ssh client of your choosing)
- Ethernet cable
Step 1: Install OpenWRT
Navigate to the OpenWRT website and find the firmware for the Raspberry Pi you will be using. Make sure you install the Firmware OpenWrt Install URL→ this comes with the GUI/LuCI pre-installed, ready to go.
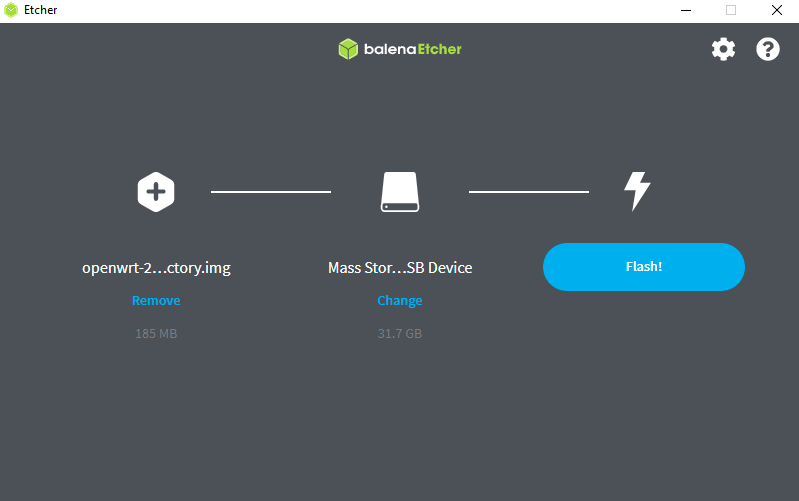
Extract the downloaded file and flash it to a microSD card using balenaEtcher or Rufus.
Once the flashing process is done, eject the microSD, put it into your Raspberry Pi, plug in your ethernet cable, and boot your Raspberry Pi.
Step 2: Initial Configuration
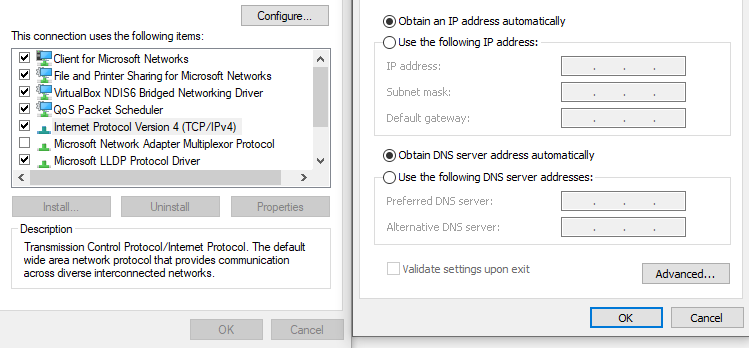
By default, OpenWRT assigns 192.168.1.1 as the static IP address. This is also the default gateway for many routers. The default IP address did not conflict with my home network configuration and I was able to leave it as is. If this is an issue for you, you can set a static IP address before you ssh into your Raspberry Pi by navigating to Control Panel>Network and Internet>Network and Sharing Centre>Ethernet>Properties>TCP/IPv4.
We will be doing the initial configuration in the command-line interface rather than using LuCI, OpenWRT’s web interface. However, you can type 192.168.1.1 (or the static IP that you set) into your web browser and do all of the following configuration changes in LuCI.
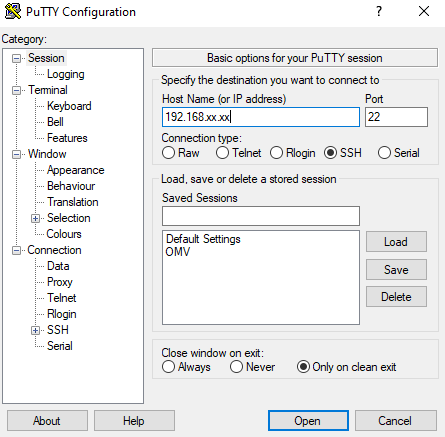
Open up puTTY and load your Raspberry Pi’s IP address into the Host Name (or IP address) field and hit open to initiate the SSH session.
Once you have established the session, sign on with the default username root.
Now, we need to change the default password by typing in:
passwdConfiguring Network and Firewall
We need to make changes to the network and firewall files on the Raspberry Pi. To do this, we need to change directories using the following command:
cd /etc/config
ls # This lists all of the contents in this directory
In this directory, you will see some of the files that we will be making edits to such as network, firewall, DHCP, system, wireless, etc.
We will be using vim, a screen-based text editor program for Unix until we can install nano. Use the following command to edit the network file:
vi networkOnce you open the network file, you will notice it is locked. You need to press the “i” key on your keyboard to enter insert mode in vim.
We are going to make changes to the lan interface in the network file, add a wwan interface, and add DNS servers. Make sure the following changes are made to the network file:
config interface 'lan'
       option device 'br-lan'
       option proto 'static'
       option ipaddr '10.71.71.1' # We are utilizing a private IP for security
       option netmask '255.255.255.0'
       option ip6assign '60'
       option force_link '1' # Force save config on int 'lan'

config interface 'wwan'
       option proto 'dhcp' # Pulls an IP from any public WiFi network
       option peerdns '0'
       option dns '1.1.1.1 8.8.8.8' # Using CloudFlare and Google DNS servers
You can save the file and exit the text editor by pressing the escape, : (colon) followed by wq, and enter.
In the same /etc/config directory, we are going to make edits to the firewall file with the following command:
vi firewallWe are making only one edit to the firewall file and it lies under the wan zone. Make sure your edits match the following code:
config zone
       option name wan
       list network 'wan'
       list network 'wan6'
       option input  ACCEPT # We are changing this from Reject to Accept
       option output ACCEPT
       option forward REJECT
       option masq    1
       option mtu_fix 1
All of our edits are now saved and we can type reboot and wait for the Raspberry Pi to reboot with the new IP address 10.77.77.1.
Step 3: Configuring OpenWRT Network
Next, we need to update OpenWRT. In order to do that, we need to enable the Raspberry Pi’s built-in WiFi by editing the wireless file in the /etc/config directory.
Use the following code to make changes to the wireless file:
vi /etc/config/wirelessconfig wifi-device 'radio0' # The Raspberry Pi's built-in WiFi
option type 'mac80211'
option channel '7'
option hwmode '11g'
option path 'plaform/soc/fe300000,mmc_host/mmc1/mmc1:0001/mmc1:0001:1'
option htmode 'HT20'
option disabled '0' # Changing value from '1' to '0' to enable
option short_gi_40 '0'
Do not forget to press escape,:wq, and enter to save edits and escape the text editor.
Now, we need to apply our configuration to the wireless interface by using the following command:
uci commit wirelessGrab your mobile device, scan wireless networks, and you should see the SSID OpenWrt being broadcasted!
Connecting OpenWRT to WiFi
We are now going to shift to OpenWRT’s LuCI interface to make the rest of our configuration changes.
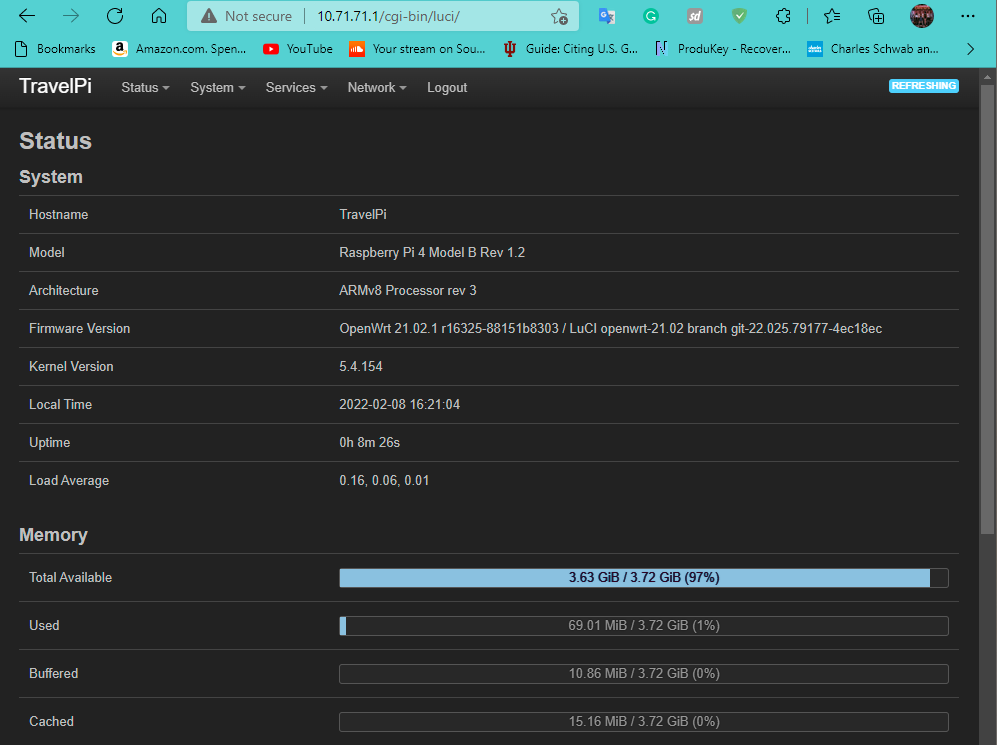
Navigate to your browser and enter the IP address of your Raspberry Pi. Log in with your credentials and you should see a menu similar to this.
Go to Network>Wireless, you will see radio0, the Raspberry Pi’s built-in WiFi, and the SSID will default to OpenWrt. You will not see radio1 until we set up the USB WiFi adapter.
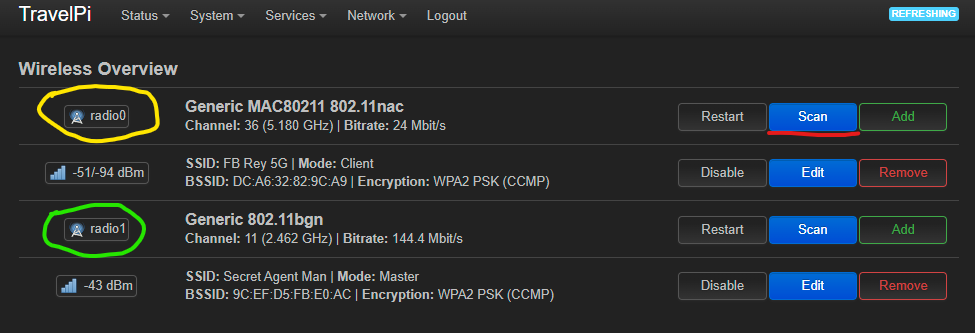
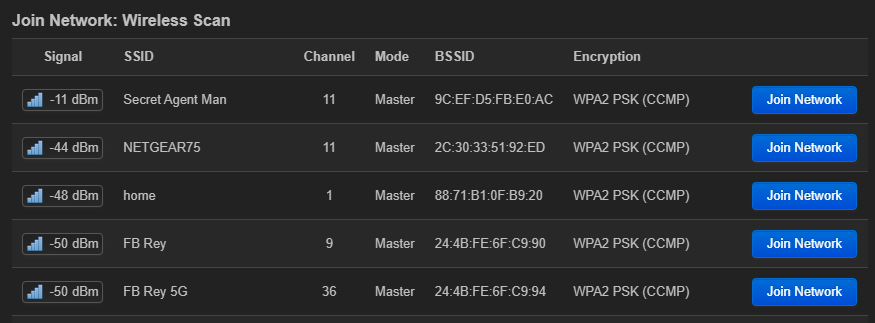
On radio0, scan for all available networks and connect your Raspberry Pi to your home network to grant it access to the internet.
Note: You will do this exact same process anytime you are at a coffee shop, hotel, or any public WiFi network you want to connect to. The Raspberry Pi acts as a client that connects to any open wireless network you have access to at the time.
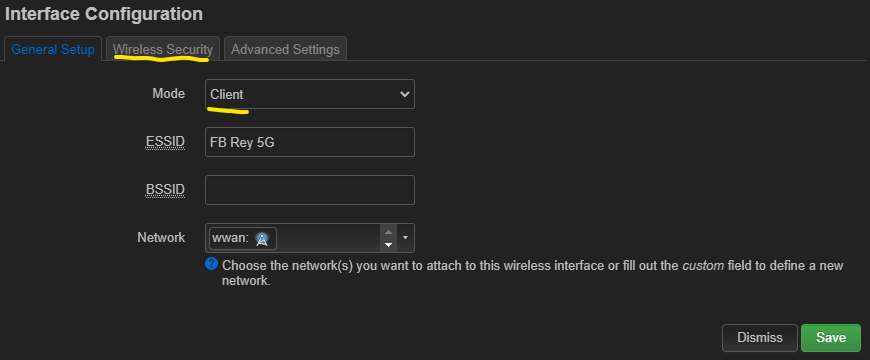
In your interface configuration, setup radio0 by ensuring the following:
- Mode is set to Client
- SSID matches the network you want to connect to
- Network is set to wwan
- Under Wireless Security, enter the passphrase to the network
- Toggle the box that says “Replace wireless configuration”, and save your edits.
Press “Save & Apply” at the Wireless Overview screen to save your edits and your Raspberry Pi should now have access to the internet.
Setting Up USB WiFi Adapter
The additional USB WiFi adapter acts as an access point for you to connect your personal devices. I would refer to this guide that goes into detail with a list of USB WiFi adapters that work best for specific applications. I personally used the Panda PAU06 USB WiFi adapter and it worked straight out of the box with speeds close to 300Mbps. I also attempted to use the TP-Link Archer series of USB WiFi adapters, but I could not get them to work with the drivers on OpenWRT.
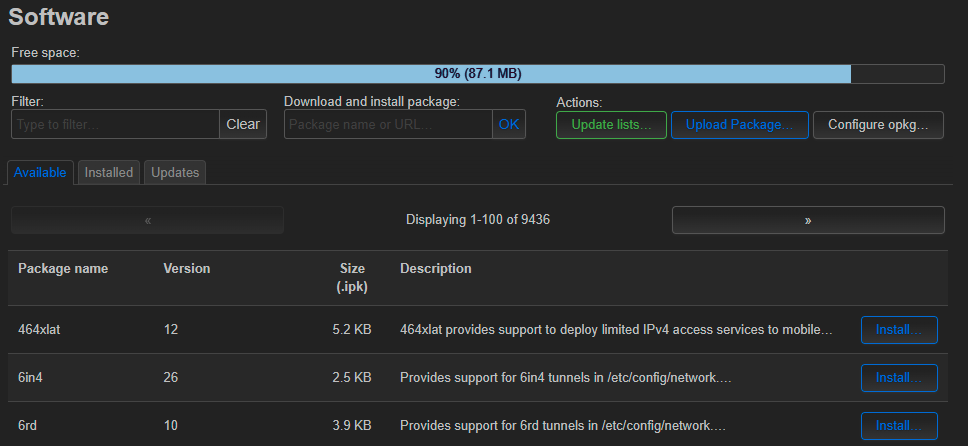
We are going to navigate to System>Software and update the OpenWRT packages using the Update lists action button. A script will run that will determine the packages that need to be updated and you can install them by going into the Updates tab.
You can also do this by running the opkg update command over ssh.
Next, we will are going to install the USB WiFi adapter drivers along with nano, an easier-to-use terminal file editor. I did some research beforehand and found that the Panda PAU06 uses the Ralink RT5372 chipset which coincides with the rt2800usb modules in OpenWRT.
I recommend using puTTy to install the drivers; however, you can also search each driver in the Software page of LuCI and install each module individually. Use the following code to install the drivers for the Panda PAU06 or similar adapters that use the same chipset.
opkg install kmod-rt2800-lib kmod-rt2800-usb kmod-rt2x00-lib kmod-rt2x00-usb kmod-usb-core kmod-usb-uhci kmod-usb-ohci kmod-usb2 usbutils nano
If you do not know your chipset/driver information, use the following code to download the drivers for general USB devices.
opkg install kmod-usb-core kmod-usb-uhci kmod-usb-ohci kmod-usb2 usbutils nano
Plugin your USB WiFi adapter into your Raspberry Pi and check if the adapter was recognized by running the lsusb command.
If the lsusb command shows your USB WiFi adapter, the adapter has been successfully recognized and registered by OpenWRT. If it does not show your adapter, you may need to double-check the driver modules you installed or install additional drivers. Refer to the user manual or documentation that came with your wireless adapter.
Now that you see your USB WiFi adapter, we need to activate the adapter using the following command:
ifconfig wlan1 upStep 4: Setting Up WiFi Access Point
Return to the LuCI dashboard, navigate to Network>Wireless and you should see your USB WiFi adapter labeled as radio1.
Set up your adapter by pressing “Edit” and make the following changes:
- Mode is set to Access Point
- Set the SSID to a network name of your choosing; default is Openwrt
- Under Wireless Security, set Encryption to WPA2-PSK.
- Set a strong password, write it down, and store it in a secure place.
- Save and apply your edits
You should now have two running WiFi connections, radio0 as your built-in WiFi, and radio1 as your access point. At this time, try connecting to your access point with a mobile device or computer to confirm that it is operational.
If it works, you can disconnect your ethernet cable.
Next Steps
You should now have a functional travel router! There are a few things I want to mention before we finish.
- Download and install the Travelmate software on your travel router. This allows you bypass captive portals at hotels and coffeeshops that will sometimes block you from establishing a connection.
- You can also do a VPN travel router and I recommend you check out NetworkChuck’s video for configuring a vpn client.
- If you don’t want to configure the vpn client on OpenWRT, you can install your VPN providers profile on your personal device and toggle it after you have connected to your travel router.
- OpenWRT has a plethora of software that you can pair with your travel router such as Wireguard, Ad-blocking software, etc.